SQL Server Replication is one of the data synchronization features that is used to copy and distribute the SQL Server database objects and data between the databases located in the same SQL Server instance or in different instances and synchronize them between these databases to keep it in a consistent state.
SQL Server Replication Components
SQL Server Replication consists of the below main components:
- Articles: The database table, stored procedures or views that are considered as the basic unit of the SQL Server Replication.
- Distributor: The SQL Server instance that contains the Distribution database, which stores the replication metadata and history. Take into consideration that the Publisher can be assigned to only one Distributor, but the Distributor can serve multiple Publishers.
- Publisher: The SQL Server instance that contains the source database and makes the data available to be distributed to the other locations.
- Subscriber: The SQL Server instance that receives the SQL Replication data from the Publisher(s) and apply it to the target database, and pass the data changes back to the Publisher in some Replication types.
- Replication Snapshot Agent: This agent is responsible for the initial synchronization in all replication types that provides a complete copy of the Publisher database articles to the Subscriber.
- Log Reader Agent: This agent is used to replicate the transactions from the Publisher to the Subscriber continuously in the Transactional Replication, by reading the transaction log of the source database.
- Distribution Agent: This agent is used to apply the initial snapshot to the target database and track and apply the continuous data changes to the target database. This agent is used with the Transactional and Snapshot replications only.
- Merge Agent: This agent is responsible for copying the changes from the Subscriber to the Publisher, then copy all changes from the Publisher to the Subscriber, in both ways. This agent is used with the Merge replication only.
SQL Server Replication Types
SQL Server provides us with different types of replication that can be used for data distribution, based on the data synchronization requirements. All the SQL Replication types start the initial synchronization between the Publisher and the Subscriber by copying a snapshot of the whole data from the Publisher to the Subscriber. These SQL Server Replication types include:
- Transactional Replication: In this replication type, all changes that are performed at the Publisher side will be delivered and applied directly to the Subscriber side. An example of the Transactional Replication is the data integration scenario between different sites.
- Snapshot Replication: In this replication type, a snapshot is taken from the Publisher and applied to the Subscriber once, without distributing the continuous changes after the snapshot, till the next synchronization occur, in which a new snapshot will be copied and applied to the Subscriber again.
- Merge Replication: In this replication type, changes can be performed and synchronized on both the Publisher and Subscriber sides and synchronized when the subscriber is connected to the network. An example of the Merge Replication usage is exchanging data between Point of Sale application users.
- Peer to Peer Replication: A special type of Transactional Replication in which the Publisher distributes the data changes to multiple Subscribers at the same time.
- Bidirectional Replication: Another special type of Transactional Replication in which both servers act as Publisher and Subscriber and exchange data between each other.
SQL Server Replication Requirements
Before we setup and configure the SQL replication site, we need to make sure that the following points are checked:
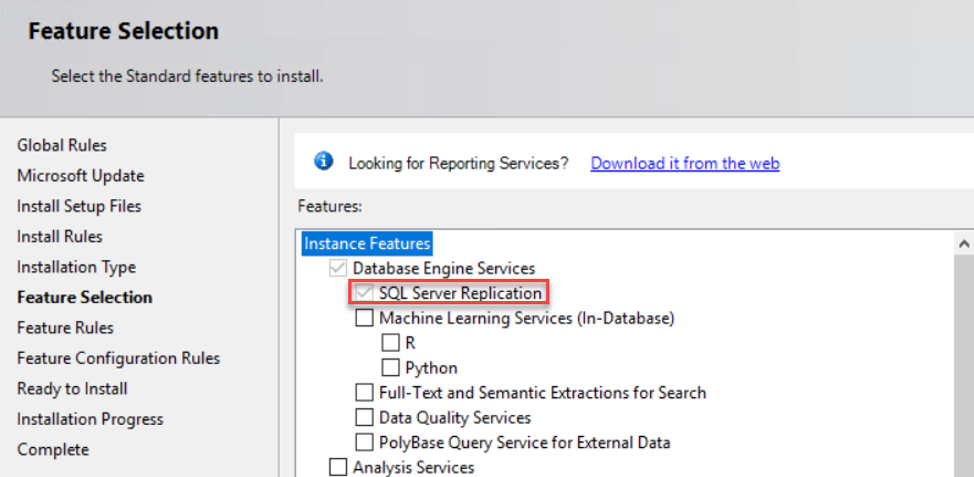
- The SQL Server Replication component is installed in all participating servers, the Publisher, the Subscriber, and the Distributor. This should be installed during the SQL Server instance installation or added to the existing SQL instance later, using the SQL Server Installation wizard, as below:
- There is enough space on the servers for the snapshot creation, the published database data in the subscriber and the transaction log growth of the Publisher database.
- The SQL Server Agent is up and running, to be able that the SQL server replications agents will be able to create the related SQL Agent Jobs and that the jobs will be running without any issue.
- There is sufficient network bandwidth between the participating SQL Server instances.
- The Publisher, Distributor, and Subscriber instances can reach each other, and the TCP ports that these SQL instances listen to are opened in the firewall rules. In other words, we are able to connect to each SQL instance from the other instances without any network or connectivity issue.
- The publisher database articles that will be replicated should have a previously defined Primary Key constraint, in order to maintain the uniqueness of the data.
- The account that will be used to create the replication site and run the replication agents should be at least a member of the db_owner fixed database role on both the Publisher, Distributor and Subscriber databases, in addition to the Read and Write permission on the snapshot folder.
Getting Started
In this article, we will show how to use the Transactional Replication type, to replicate the AdventureWorks2017 database tables between two SQL Server instances; SQL1 instance that will act as Distributor and Publisher, and the SQL2 instance that will act as Subscriber.
The SQL Server Transactional Replication will be configured in three steps:
- Configure the Distributor.
- Configure the Publisher.
- Configure the Subscriber
Let us discuss these steps in detail.
Configure the Distributor
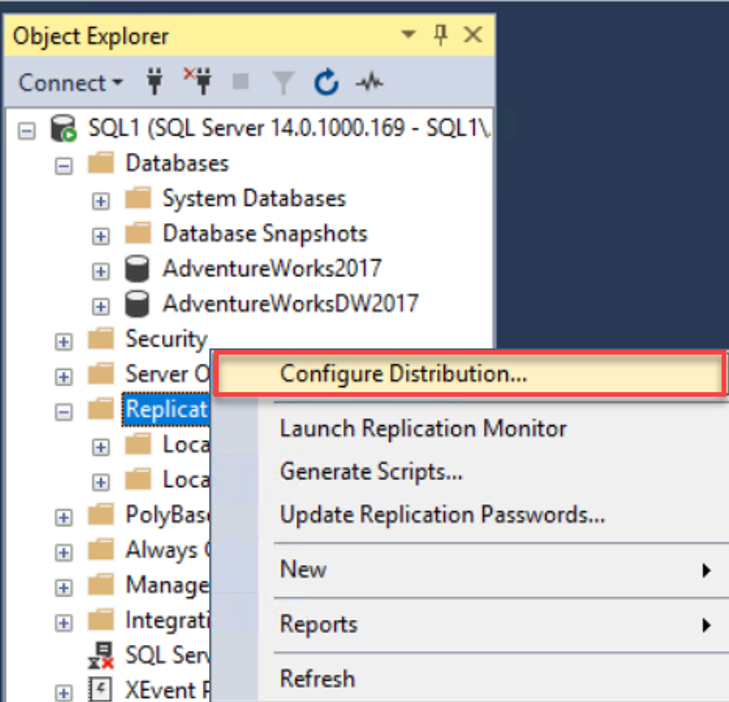
To configure the Distributor, connect to the “SQL1” SQL Server instance that will act as a Distributor, which is the same Publisher instance in our Example here, browse the Replication node in the SSMS Object Explorer, right-click on the Replication node and choose the Configure Distribution… option, as shown below:
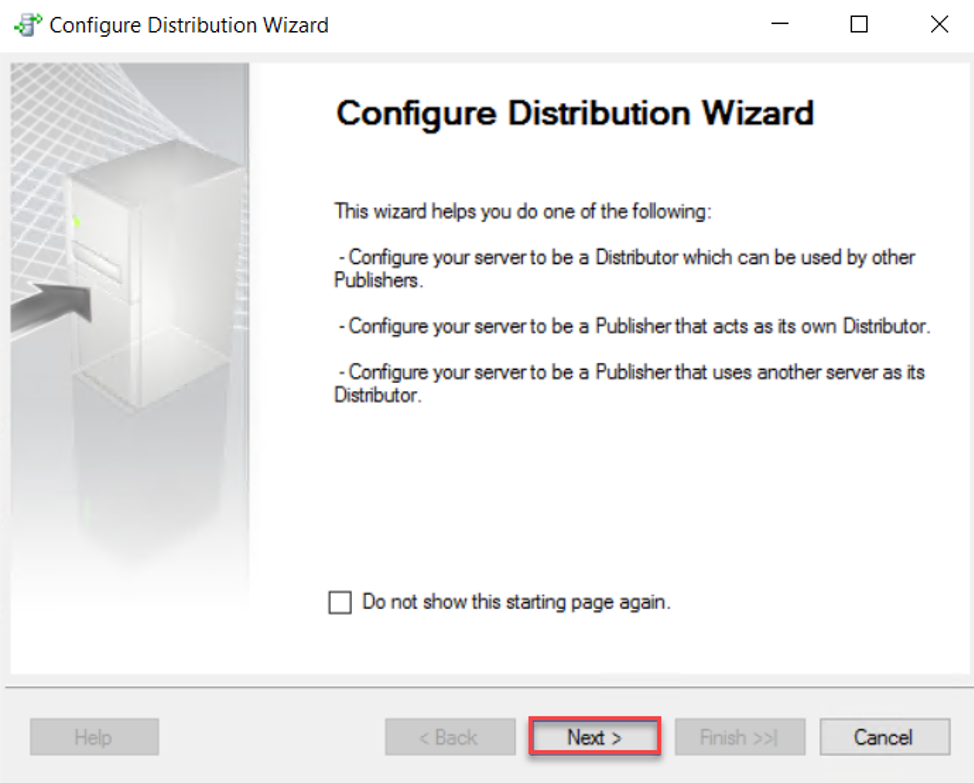
The first window that will be displayed in the Configure Distribution wizard is the starting wizard, which will summarize the list of actions that will be performed within that Wizard. Click Next to proceed:
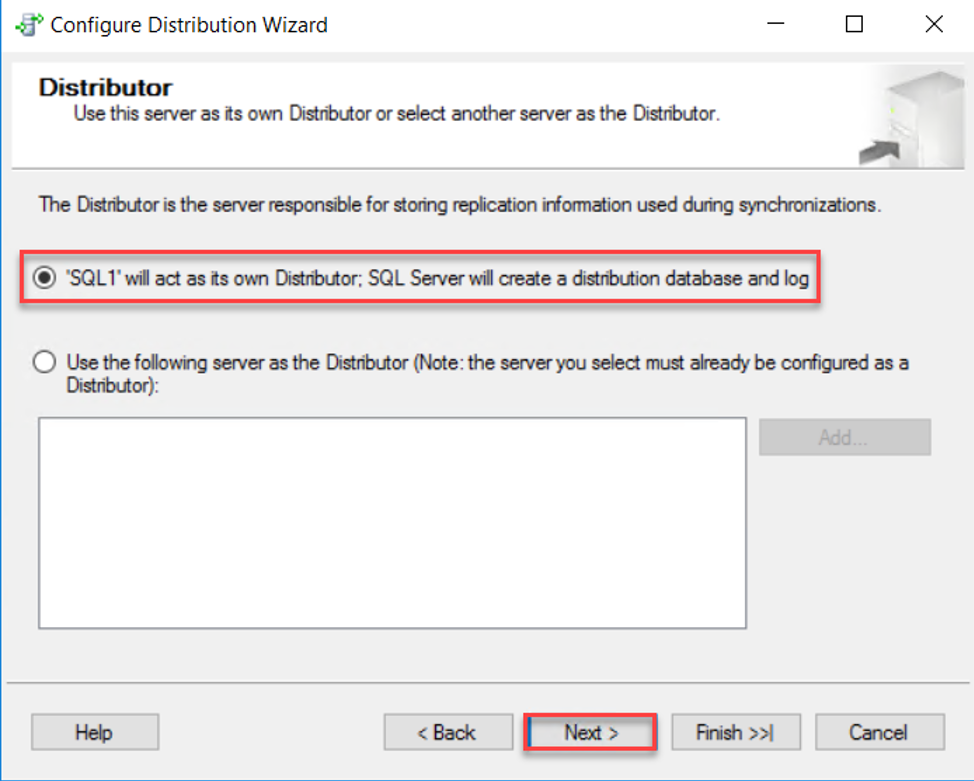
In the next window, you will be asked to select which SQL Server instance will act as a Distributor. It provides you with the option to select the current SQL Server instance as a Distributor, and create the distribution system database on that instance, or specify another SQL Server instance to be used as a Distributor. In this scenario, we will use the current SQL1 instance as a Distributor. Select the option that meets your design plan then click Next to continue:
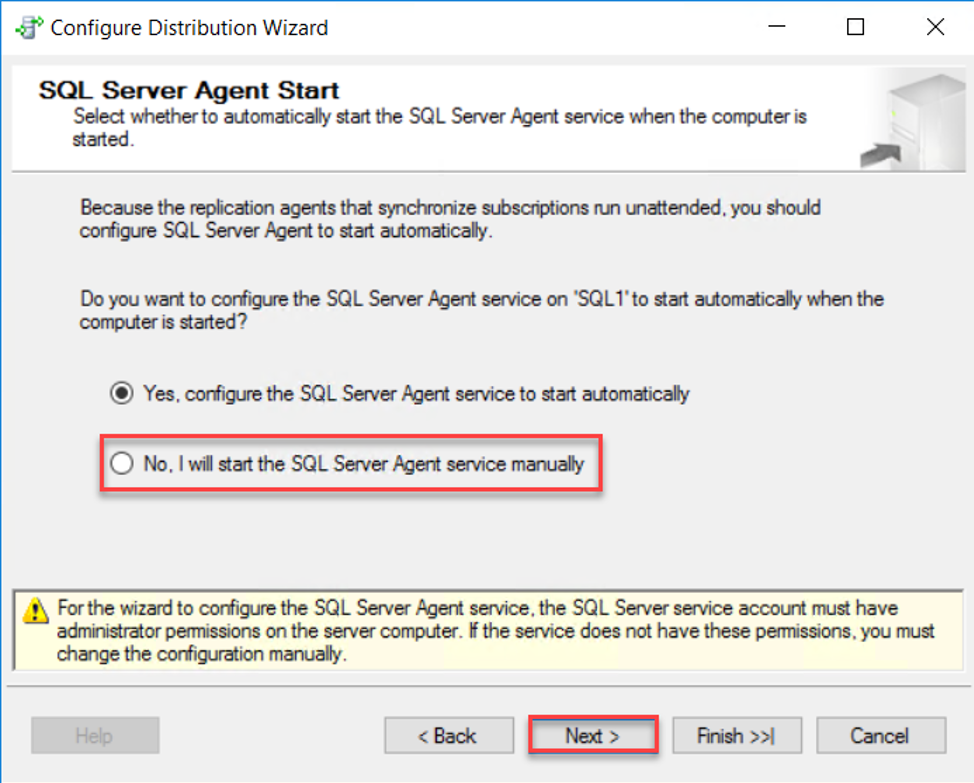
As the SQL Server Agent service plays a vital role in the SQL Server Replication process, where a SQL Server agent job will be created for each replication agent, it is recommended to change the startup mode if the SQL Server Agent service from Manual (by default) to be Automatic. So that it will run automatically when the SQL Server is restarted, without having the risk of forgetting to start it manually. This wizard provides you with the ability to change the SQL Server Agent Service startup mode automatically, taking into consideration that the SQL Server service account has administrator privileges on that server to perform that action. In our case, we will perform that change manually. Click Next to proceed:
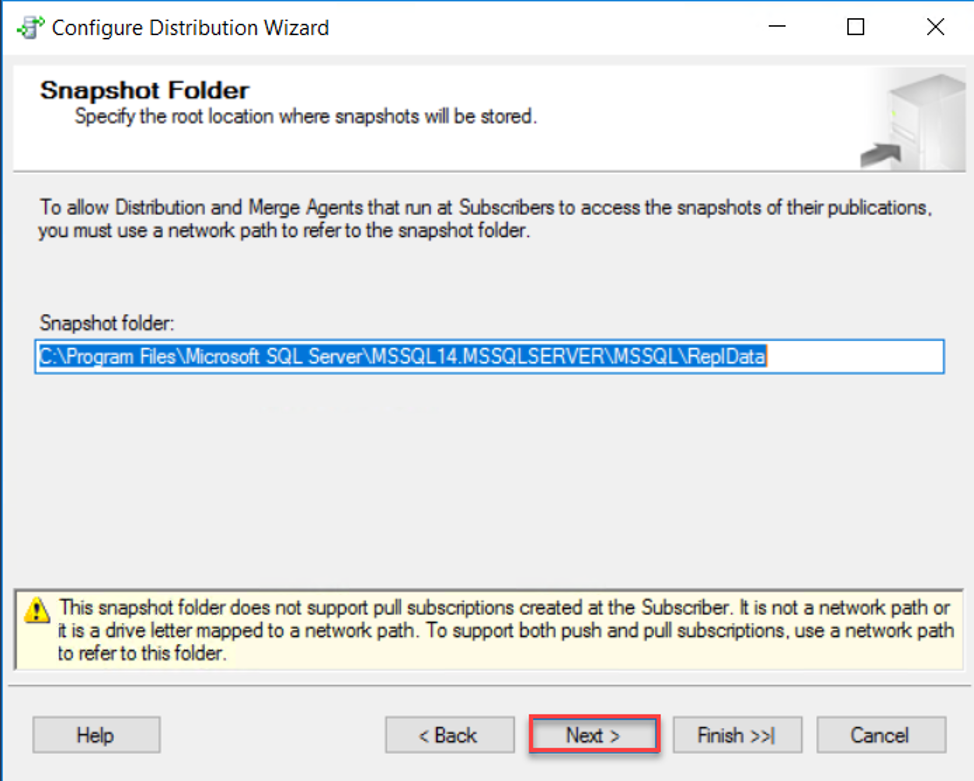
After that, the wizard will ask you to specify the folder where the initial synchronization snapshot will be created. Specify a folder in the disk drive that has enough space then click Next to continue:
In the next window, you will be asked to specify the name of the distribution database, and the location where to store the data and log files for that database. Specify your customized name and location or keep the default settings then click Next to proceed:

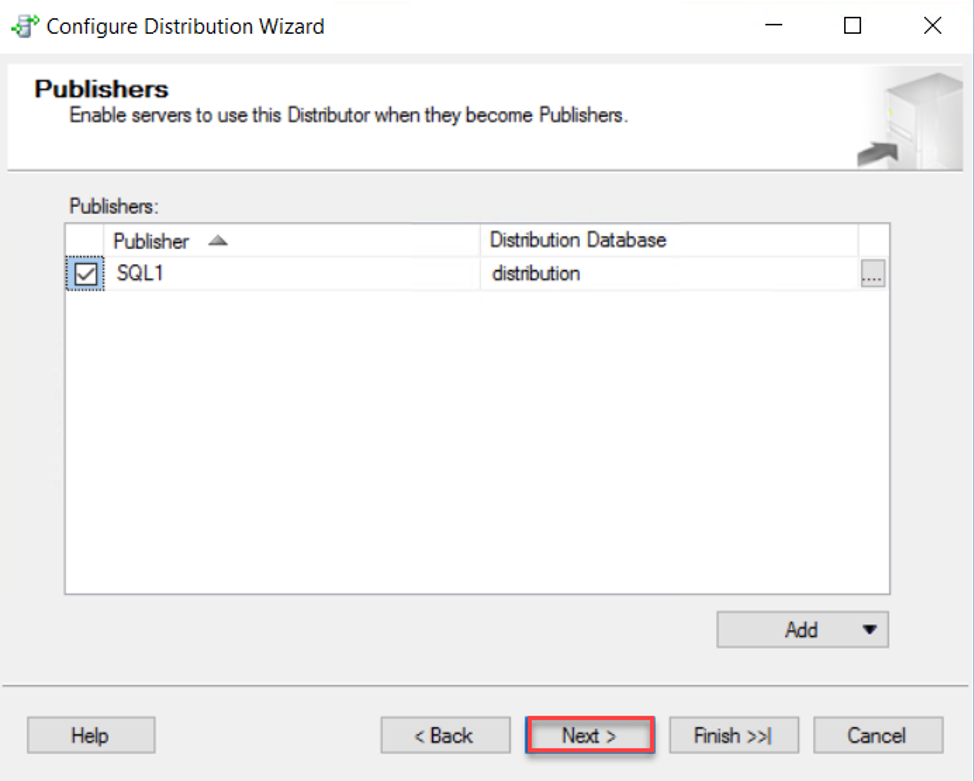
After that, you need to select the list of SQL Server instances that will act as Publishers and store its metadata in that distribution database. If you have a predefined topology, add all candidate publishers, then click Next to continue:
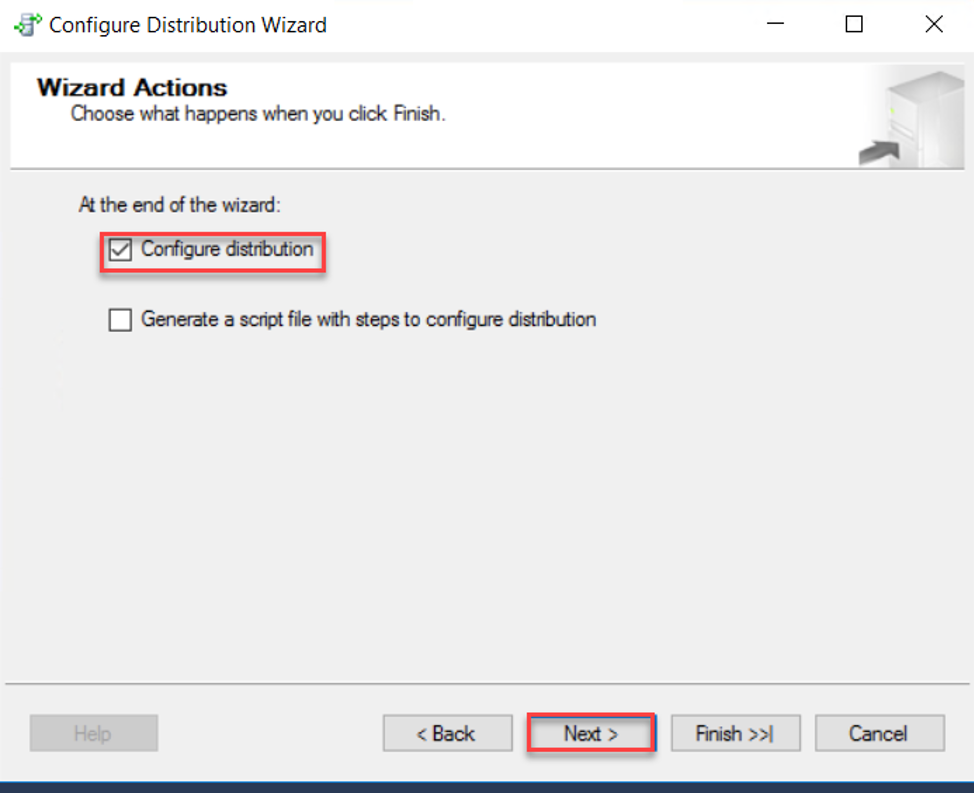
On the next window, choose the actions that will be performed by that wizard, whether to configure the distribution directly, generate a script file for the mentioned configuration steps or both. In our scenario, we will configure the Distribution directly. Click Next to proceed:
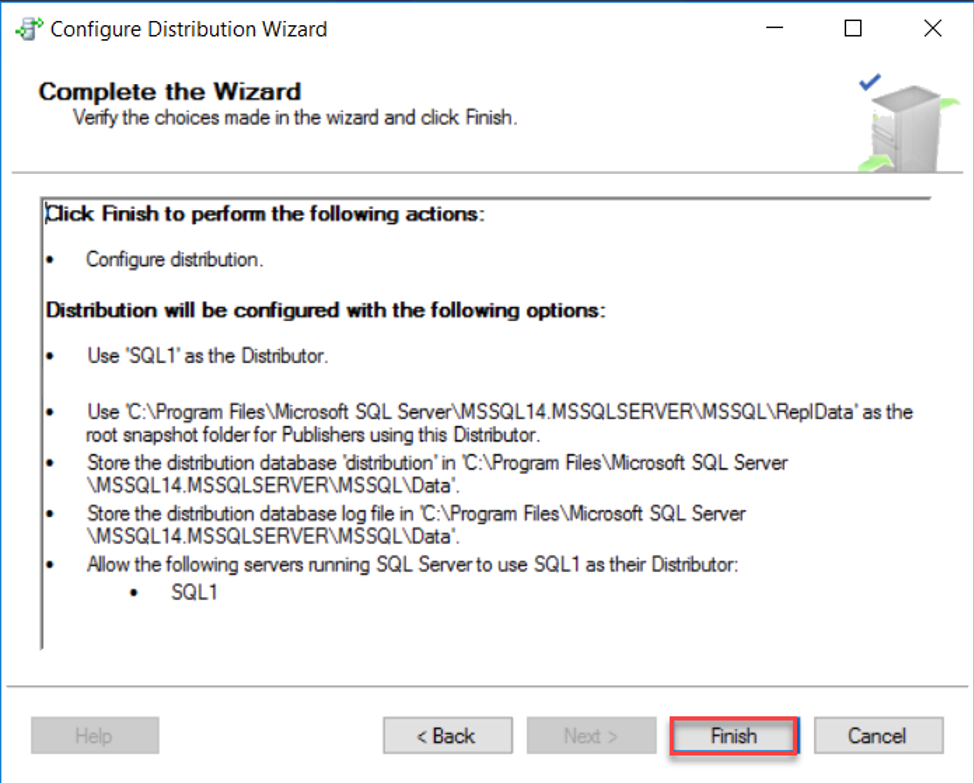
In the Complete the Wizard window, review all the selections that you performed previously and make sure that no change should be performed on these selections, then click Finish to start the configuration process:
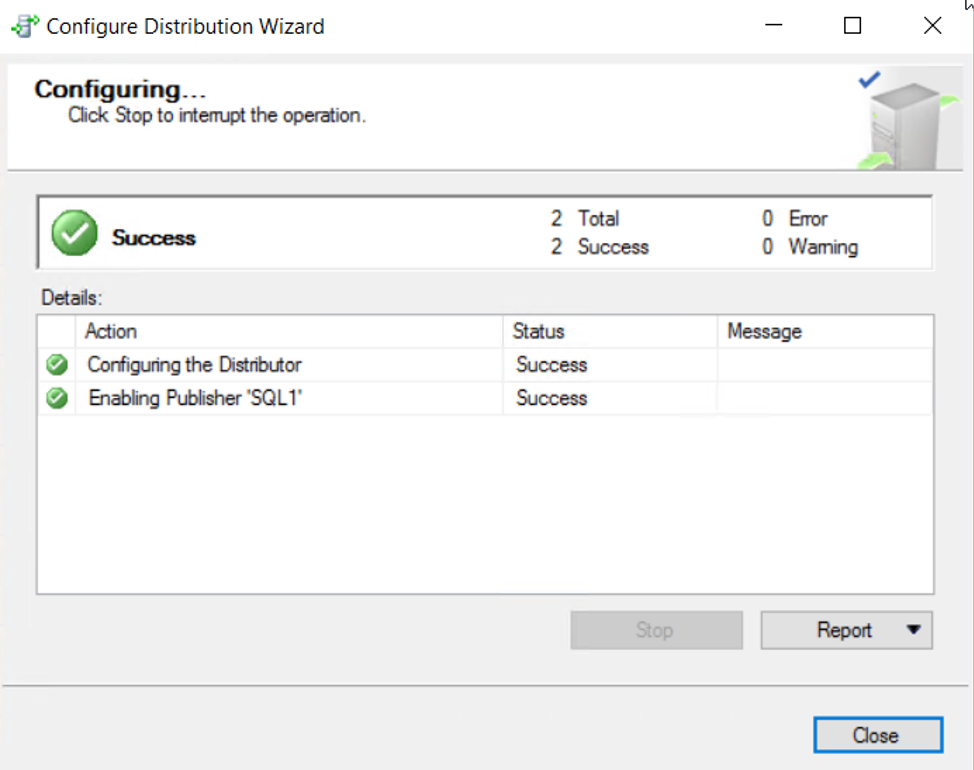
When the Distribution configuration process completed successfully, the wizard will notify you with a green check beside each action. If any issue is faced, a meaningful error message will be displayed in order to fix it and repeat the configuration again. As we have all actions completed successfully, Close the configuration wizard:
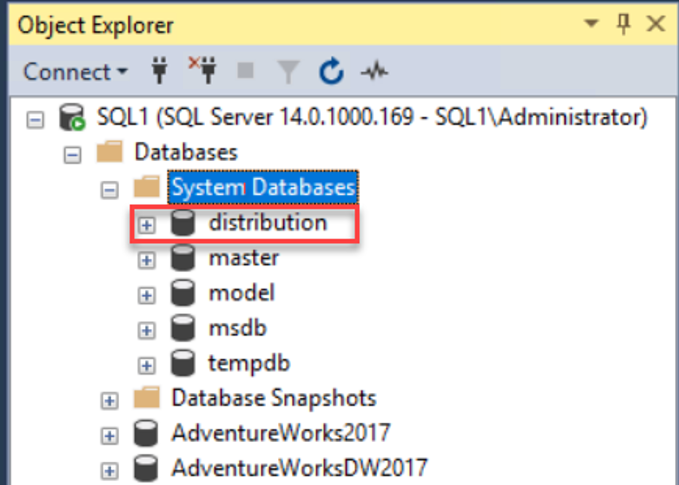
If you expand the System Databases node, in the SSMS Object Explorer, you will see that a new distribution system database is created that will be used to store the SQL Server Replication metadata, as shown below:
Configure the Publisher
After configuring the Distributor, the next step is configuring the Publisher that acts as the data source for the other sites.
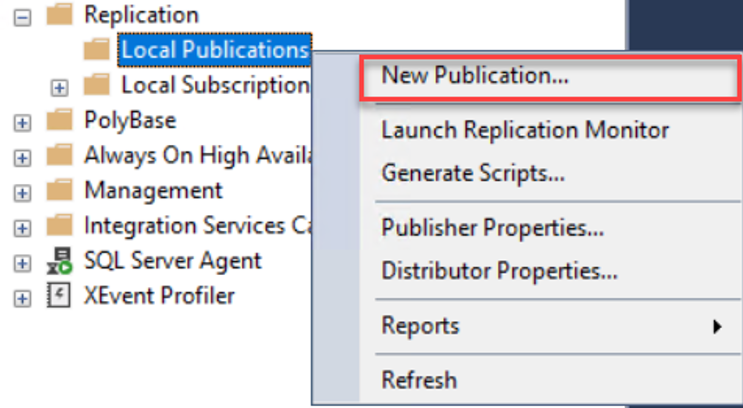
To configure the Publisher, connect to the SQL Server instance that contains the database to be published, browse the SQL Server Replication node under the Object Explorer then right-click on the Local Publications node and choose New Publication … option, as below:
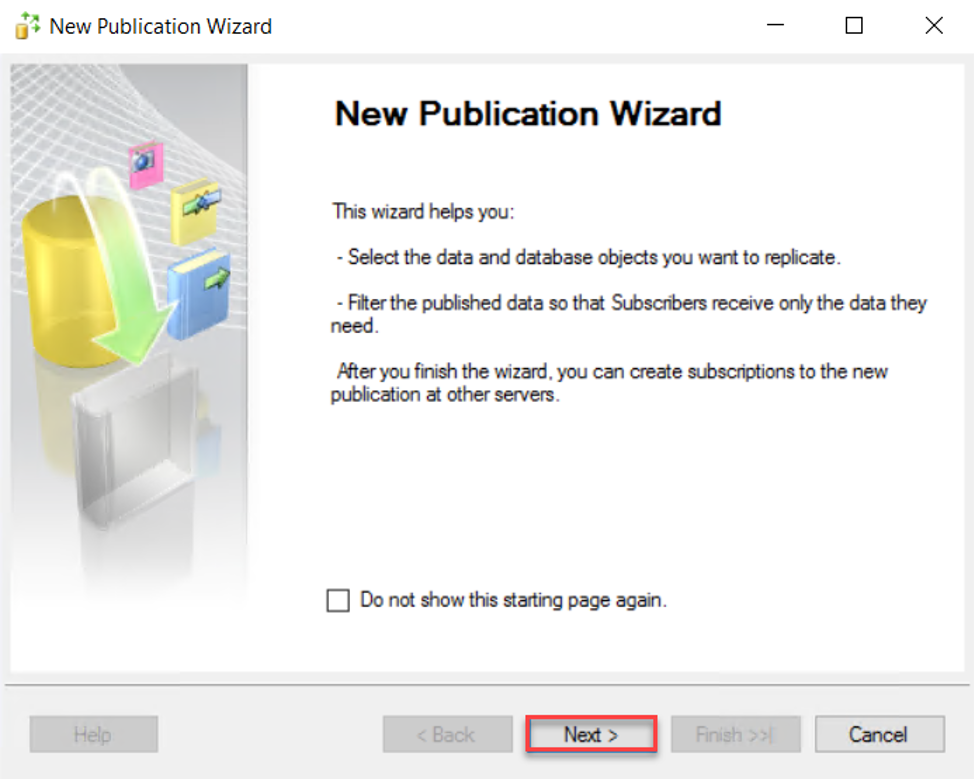
The first window in the New Publication Wizard is the starting page, which shows the list of actions that will be performed under that wizard. After reading how this wizard will help you click Next to continue:
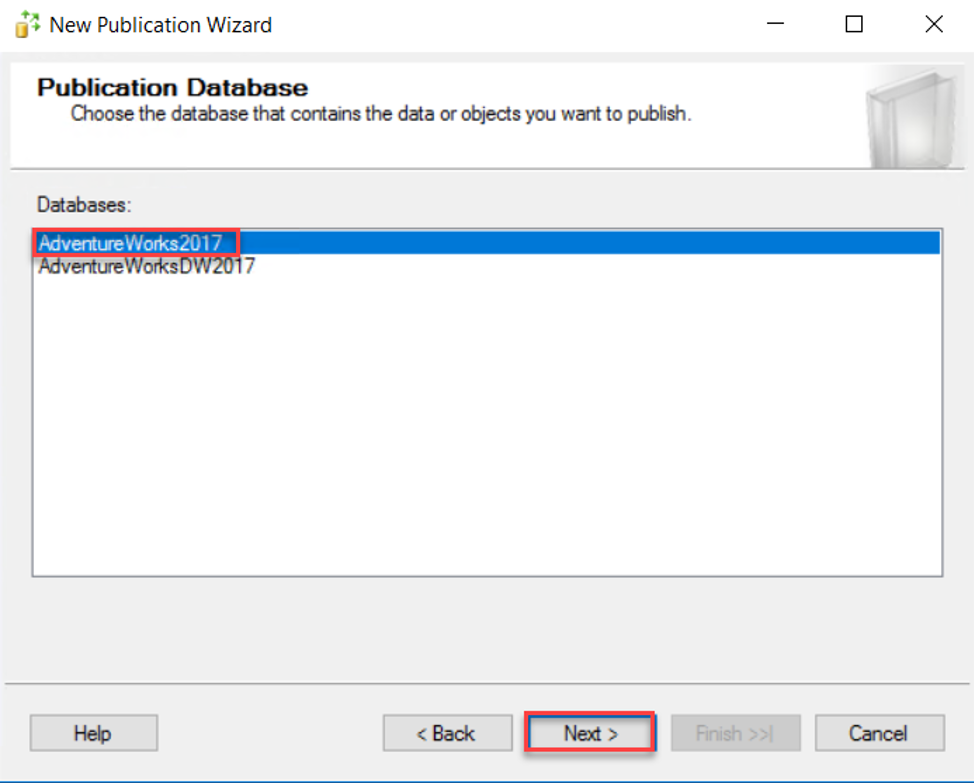
On the next page, you will be asked to select the database that will be published to the Subscribers, which is the AdventureWorks2017 database in our demo here. Click Next to proceed:
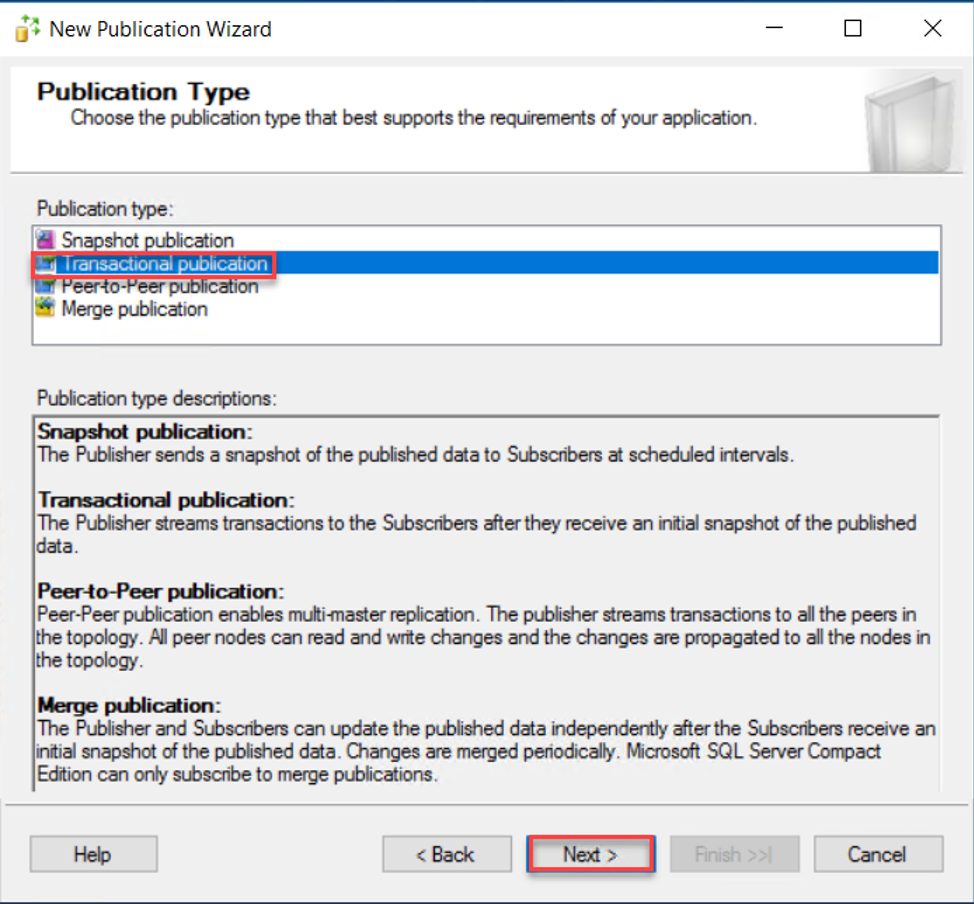
After that, you will be asked to select the type of publication that you manage to use. We discussed earlier in this article the list of SQL Server replication types that are provided in SQL Server. In this demo, we will use the Transactional Publication type. Click Next to continue:
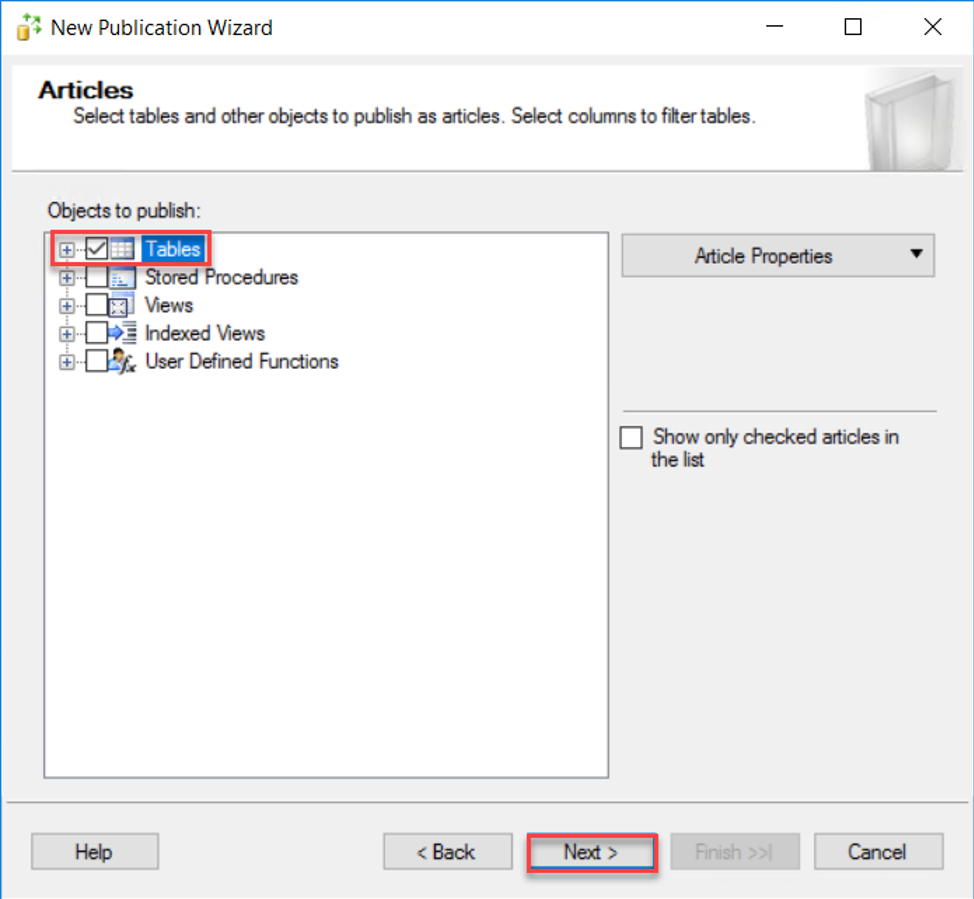
In the Articles page, you can select the list of database objects that you plan to replicate to the Subscribers. You have the choice to choose all available objects under each type or expand the object's type and select the list of objects to be replicated. In this demo, we will replicate all the database tables to the Subscribers. After reviewing the object’s selection, click Next to proceed:
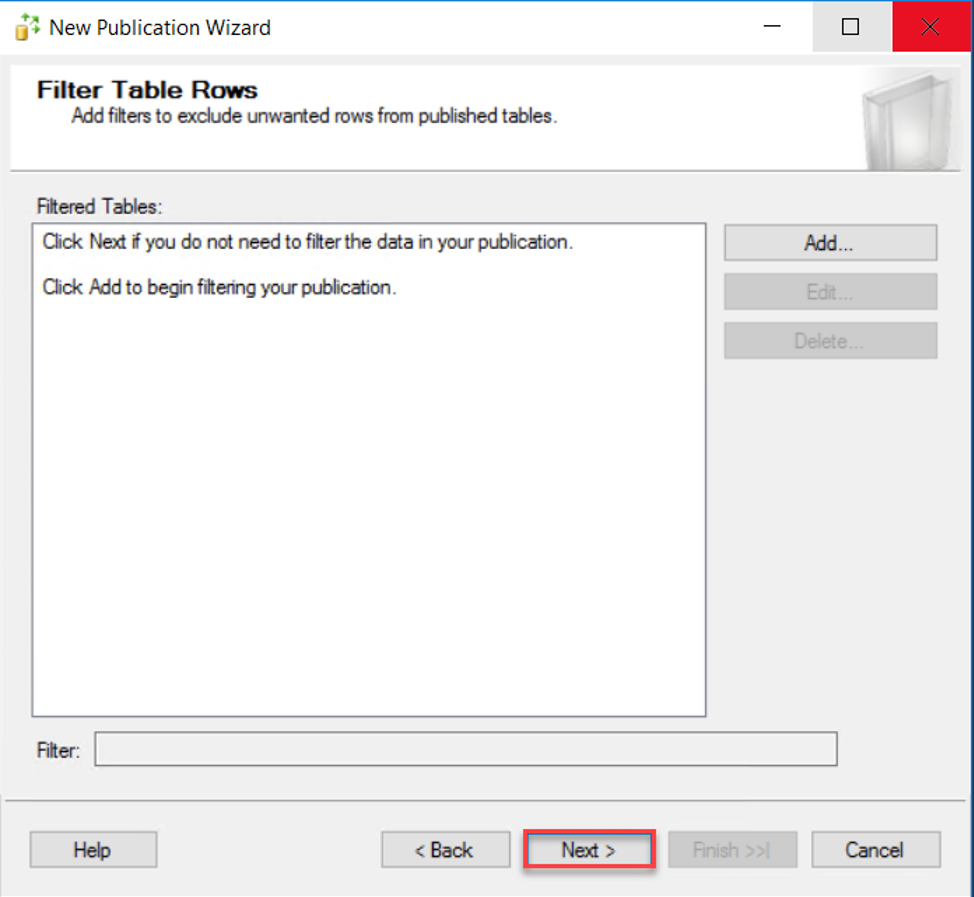
SQL Server allows you also to add filters for the selected database objects and replicate only the data that meets the added filters criteria. If you plan to replicate the whole table rows, skip this page by clicking on the Next button:
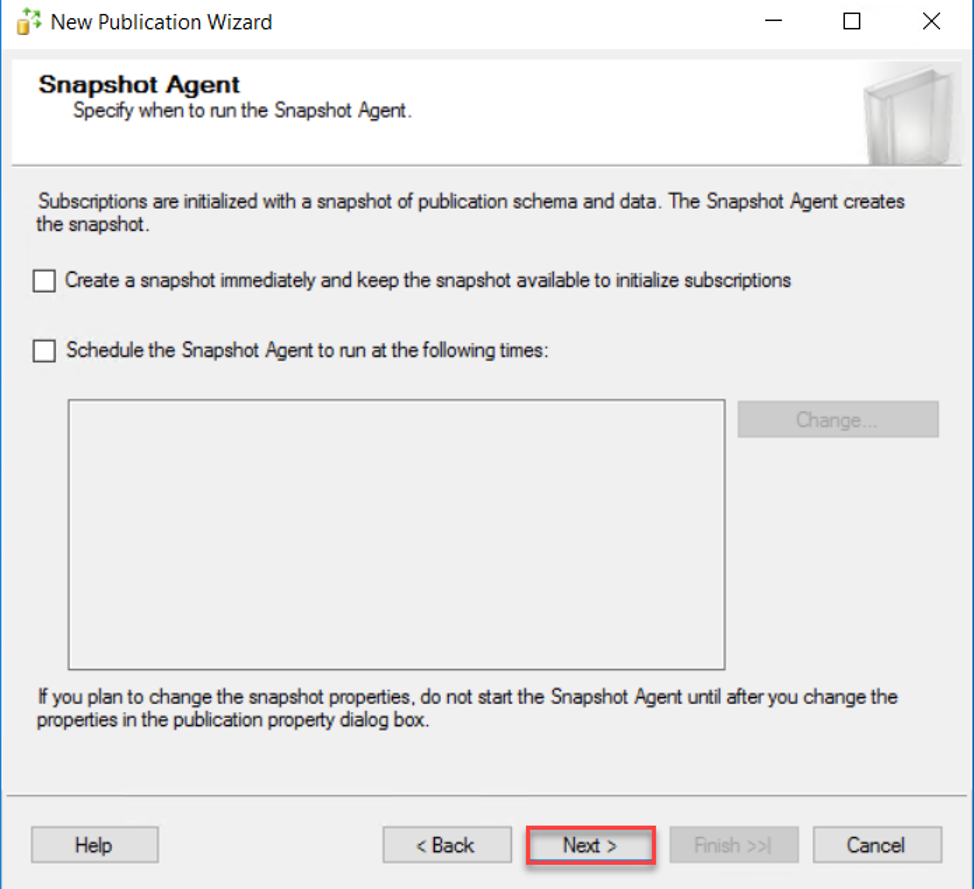
In the Snapshot Agent page, specify if you plan to create the initial synchronization snapshot immediately, schedule it to be run later or run it manually when you complete the replication setup. In this demo, I will create a snapshot after completing the SQL Server replication setup. Click Next to continue:
After that, you will be asked to configure the account that will be used to run the Snapshot Agent and the Log Reader Agents. This user should have at least db_owner permission on the Publisher, Distributor, and Subscriber database, in addition to Read and Write permissions on the snapshot folder. You can also use the SQL Agent Service account to run these SQL Server replication agents, which is not recommended from security-wise. Provide the authorized account and click Next to continue:

In the Wizard Actions page, select the actions that will be performed after completing this wizard, which includes the publication creation and generating a script file to create the publication later or use this script as a template for other servers. In this demo, we will choose to Create the publication, then click Next to proceed:

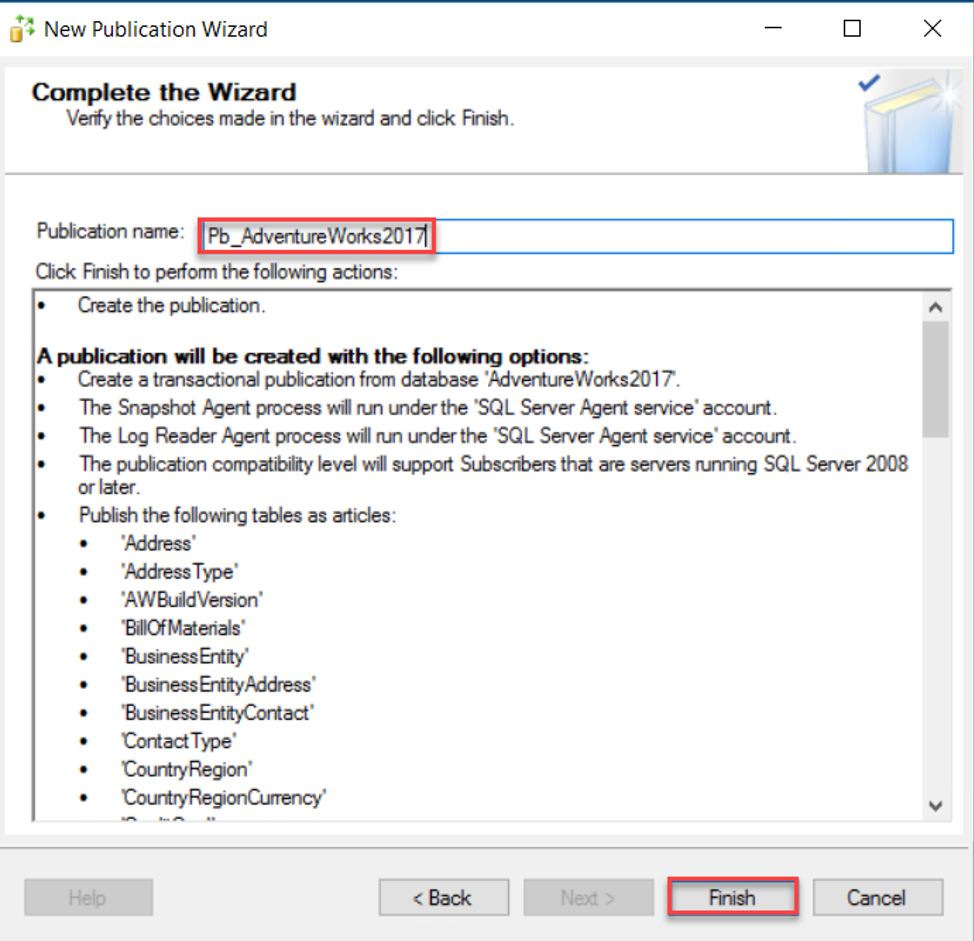
The last page is the Complete the Wizard, in which you need to provide the name of the Publication and review your choices within this wizard, then click Finish to proceed with the Publication creation:
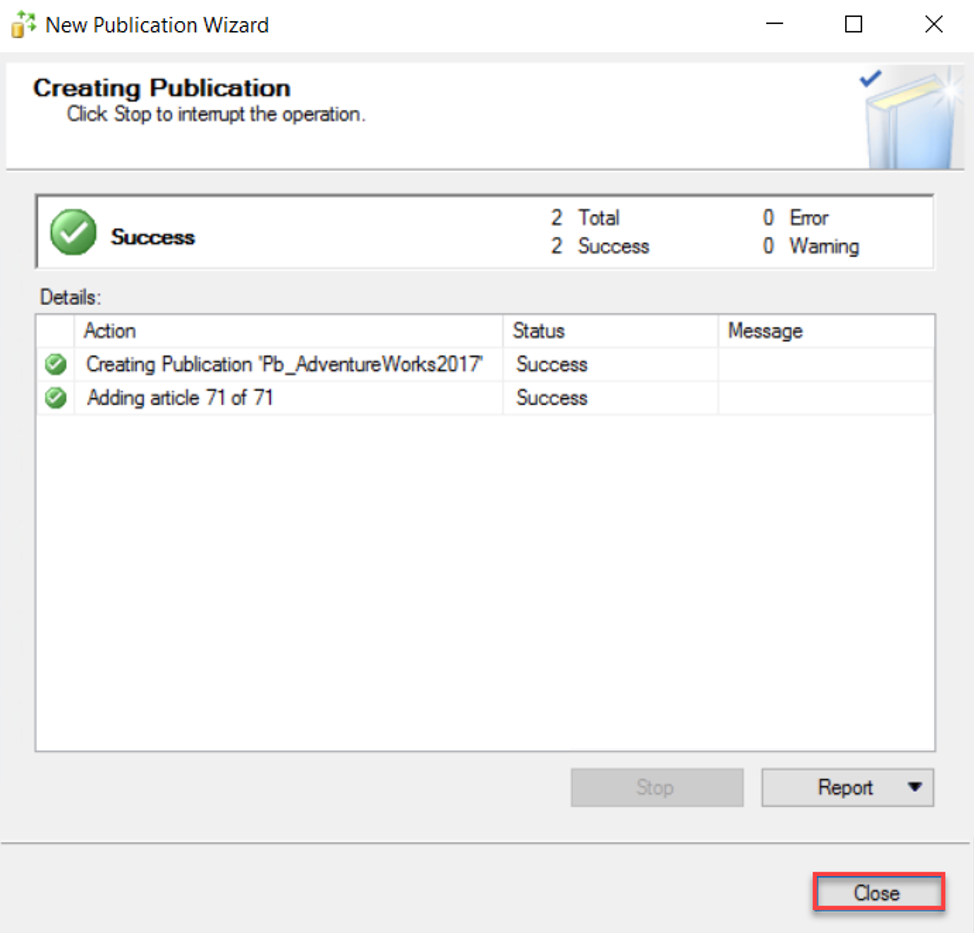
Once the Publication creation wizard is completed, it will show the result of the publication creating process and whether the process completed successfully with green checks or failed at a specific step with a meaningful error message. In this demo, the Publication is created successfully with no issue, as shown below:
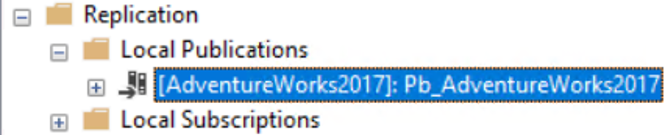
To verify if the Publication is created successfully, expand the Local Publications node under the SQL Server Replication node of the SSMS Object Explorer and check the newly created Publication. You can also review and modify the Publication settings from that Publication Properties page. The Publication will be like:
Configure the Subscriber
For now, we have the Publisher and the Distributor configured successfully, it is the time to configure the Subscriber, which acts as data target and receive the data from the Subscriber.
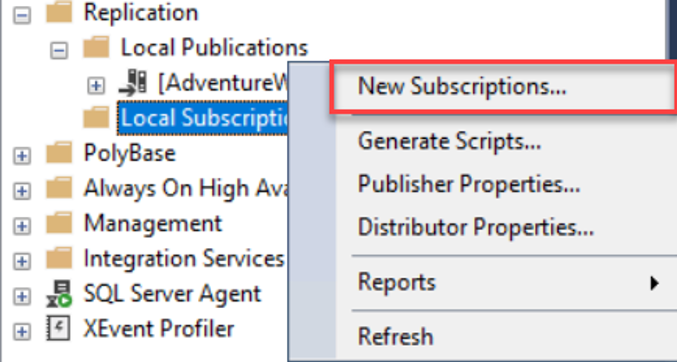
To configure the Subscriber, from the same Publisher instance, expand the SQL Server Replication node under the SSMS Object Explorer, right-click on the Local Subscriptions node and select the New Subscriptions… option, as shown below:
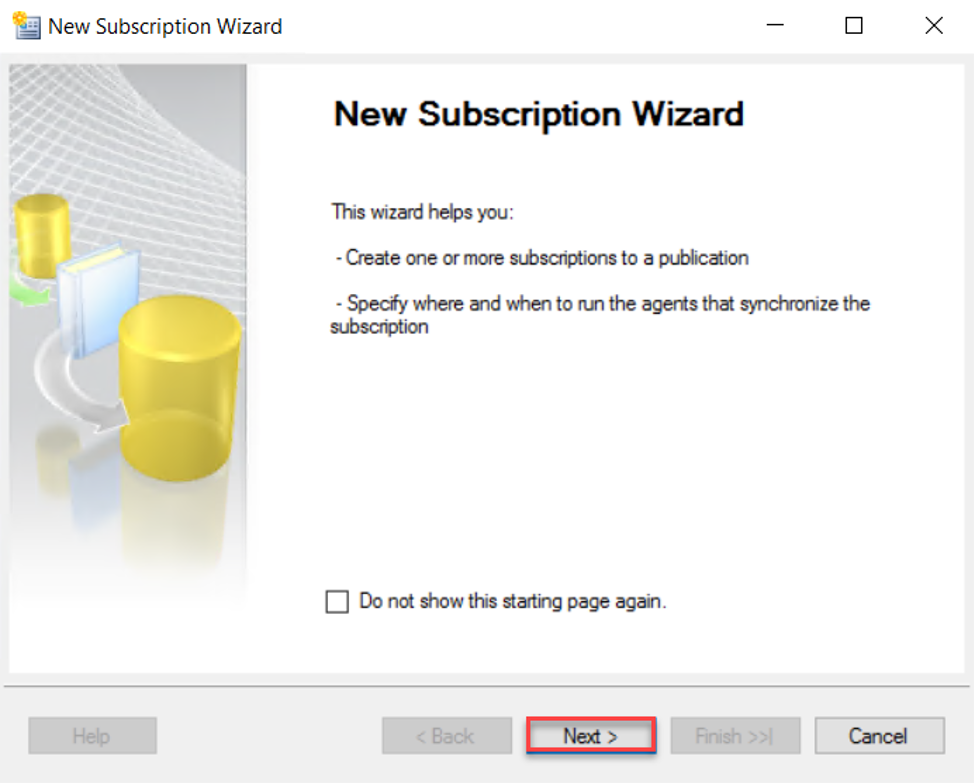
The first window displayed in the New Subscription Wizard is the starting page, which shows how this wizard will help you in configuring the Subscriber. Click Next to proceed:
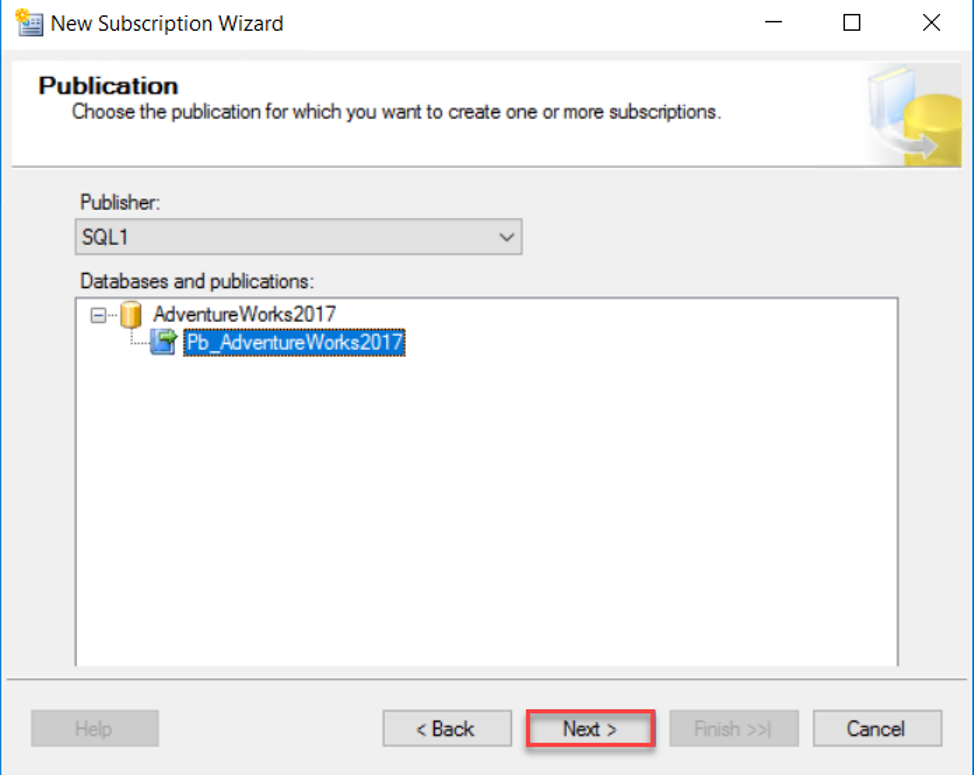
The first step in configuring the Subscriber is selecting the Publisher that the Subscriber will be created for and the Publication database that will act as the data source for that Subscriber. Select the Publication database from the listed databases then clicks Next to continue:
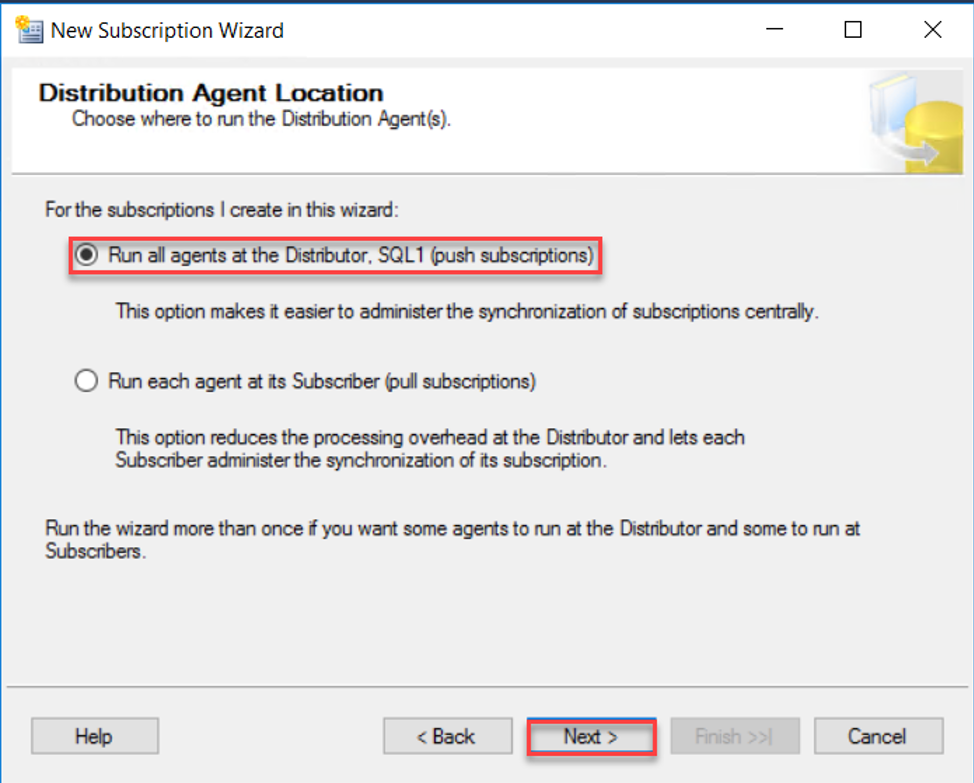
After that, you will be asked to specify whether to run all agents at the Distributor side and push the changes to the Subscriber, providing centralized administration for the replication synchronization process or run each agent at its own Subscriber that will pull the changes from the Publisher, reducing the processing overhead at the Distributor side and allow each subscriber synchronization to be administrated separately. In this demo, we will choose push subscription and click Next to continue:
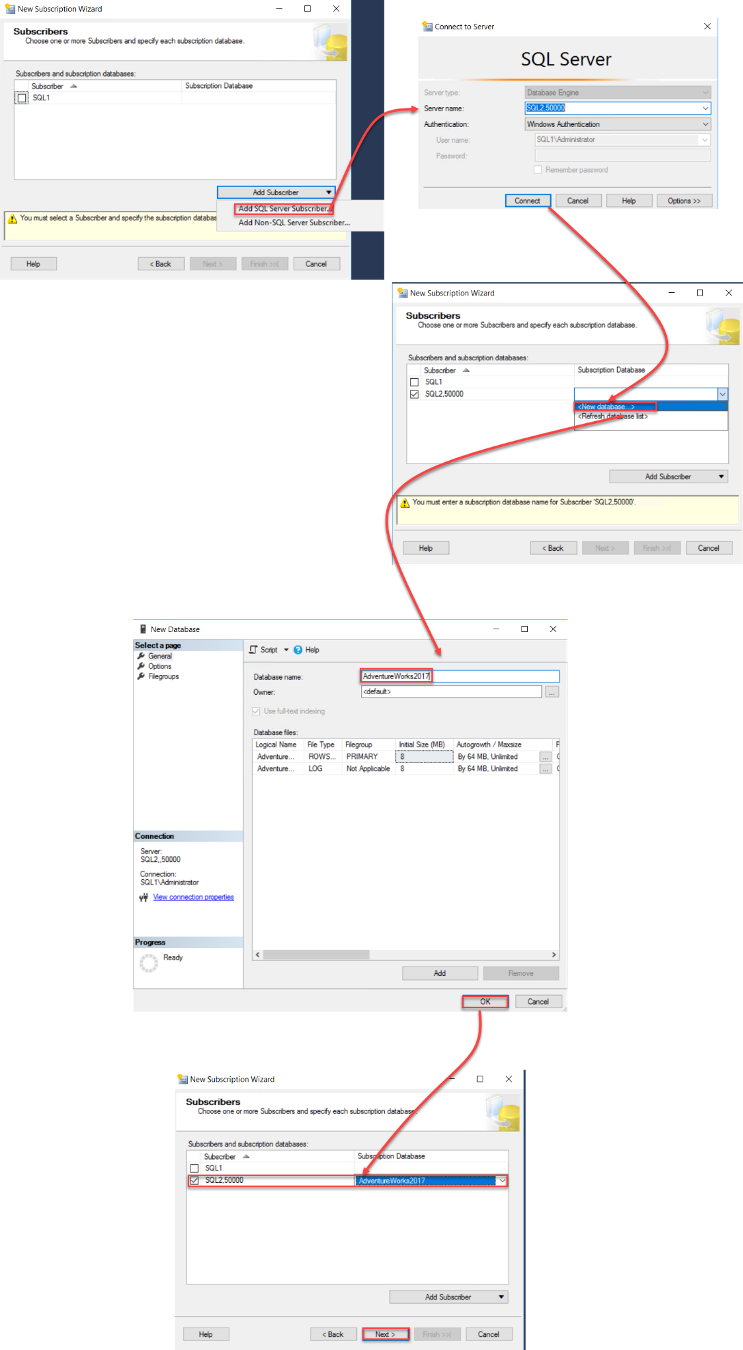
On the next window, you need to add the Subscriber SQL Server instance and the Subscription target database, with the ability to create that database if it is not existing, as shown below:
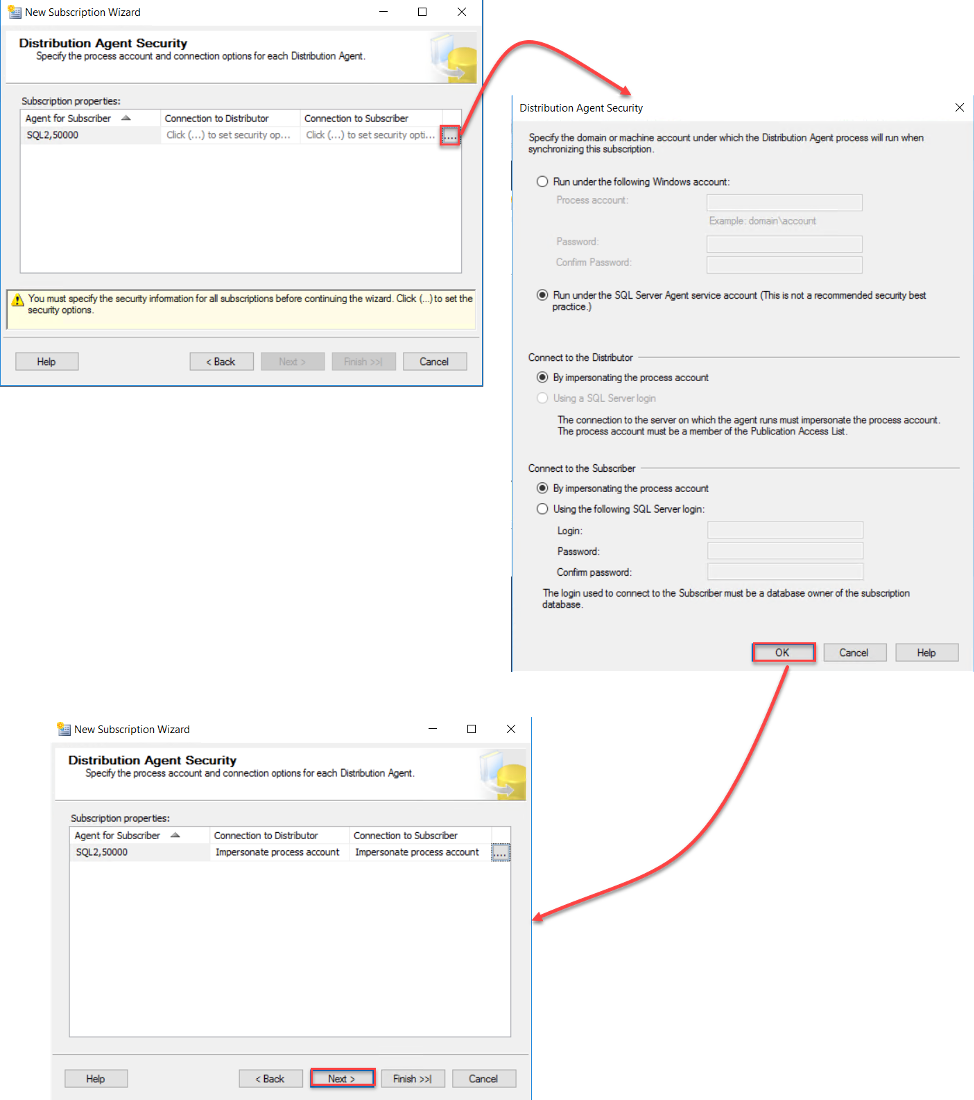
In the Distribution Agent Security page, specify the account under which the Distribution Agent will run to perform the synchronization process and the account that will be used to connect to both the Distributor and Subscriber SQL Server instances. It is recommended to provide an authorized domain account that has permission on both the Distributor and Subscriber, with the ability to use the SQL Agent Service account to connect to the Distributor and Subscriber, which is not recommended from security-wise. After providing the authorized security account click Next to continue:
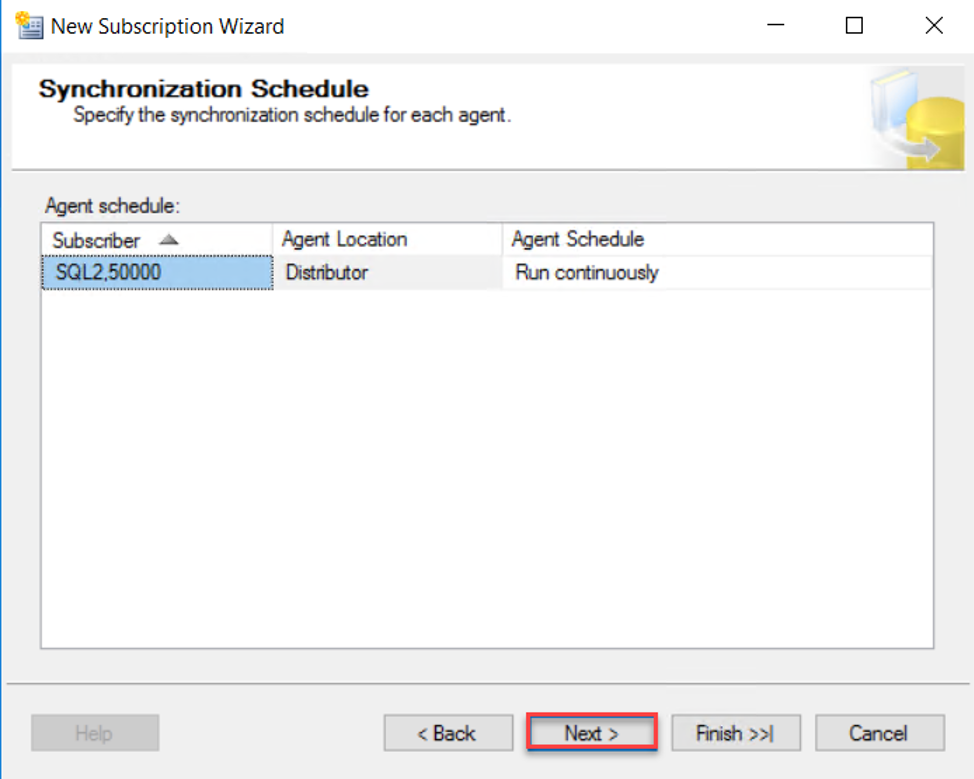
On the next page of the New Subscription wizard, specify the synchronization schedule for each agent. Keep the default setting if you want the synchronization to run continuously then click Next to continue:
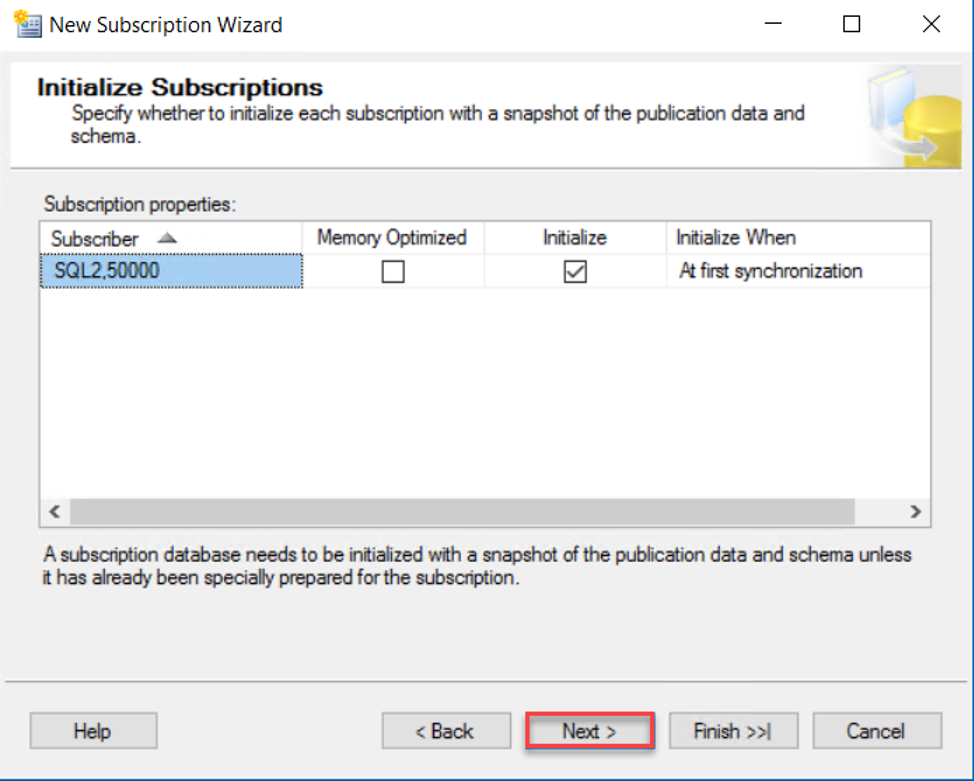
After that, you can specify whether to initialize the Subscriptions with a snapshot from the publication and when to perform that initialization process. In this demo, we choose to initialize the Subscription at the first synchronization, as shown below:
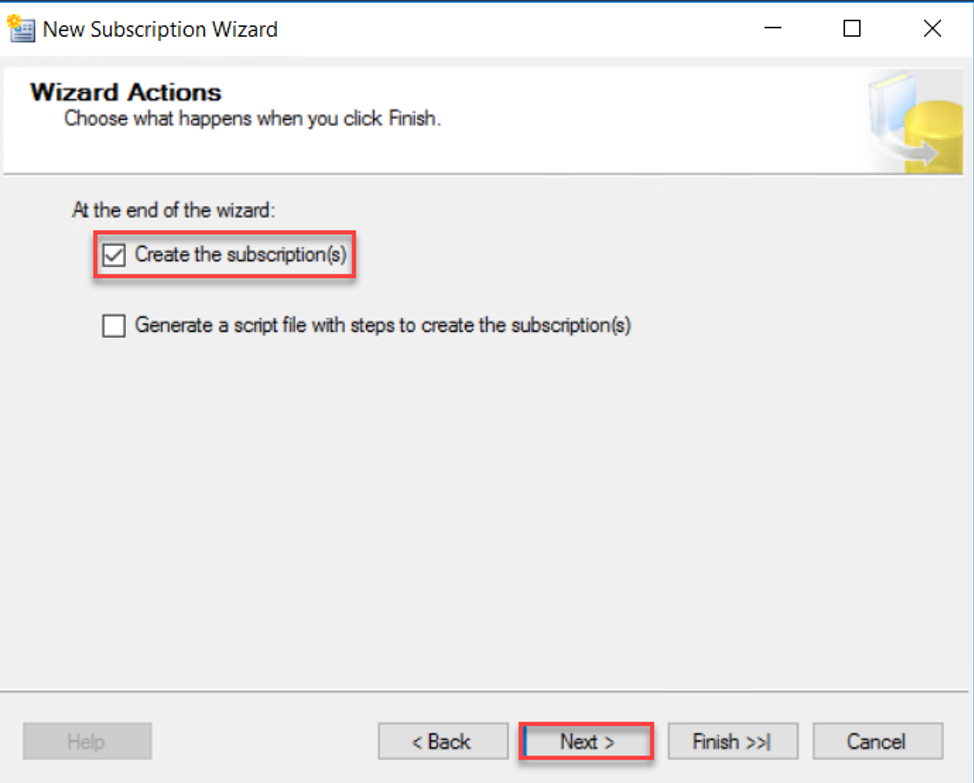
In the Wizard Actions window, you can choose what actions should be performed at the end of this wizard. For example, this wizard provides you with the option to create the configured subscription(s) and generate a script file to create the subscriptions later or in another SQL Server instance, as follows:
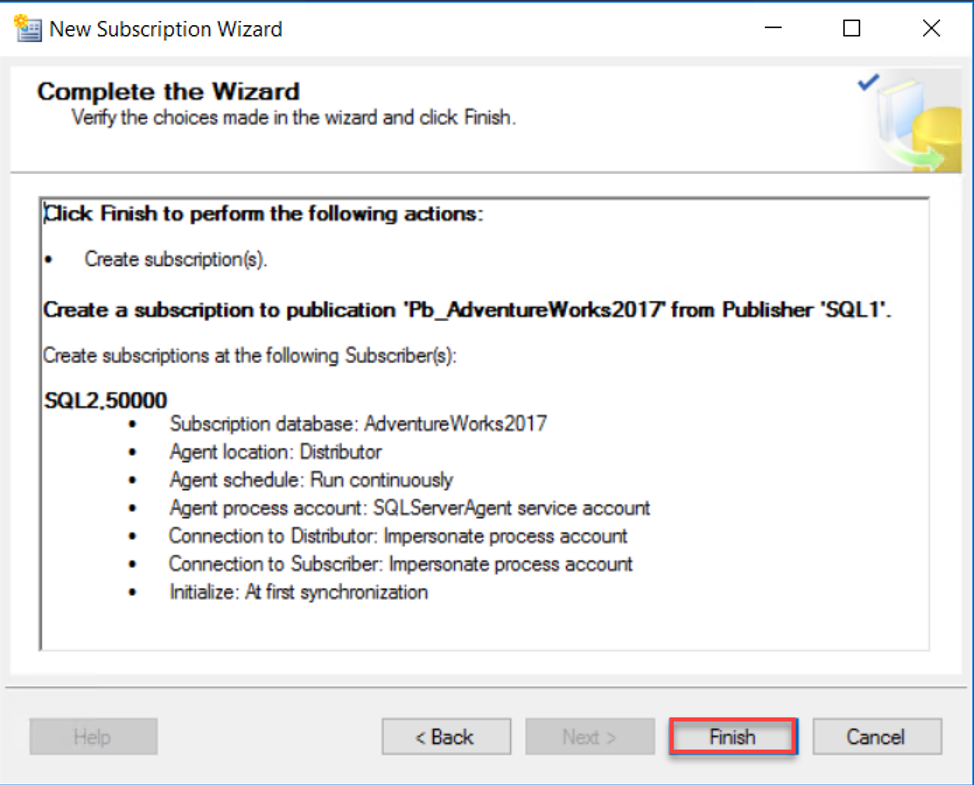
After that, the wizard will provide you with a summary of all configurations that you have selected in that wizard to verify it before starting the subscription configuration. If all the selections are fine, click Finish to start the configuration process:
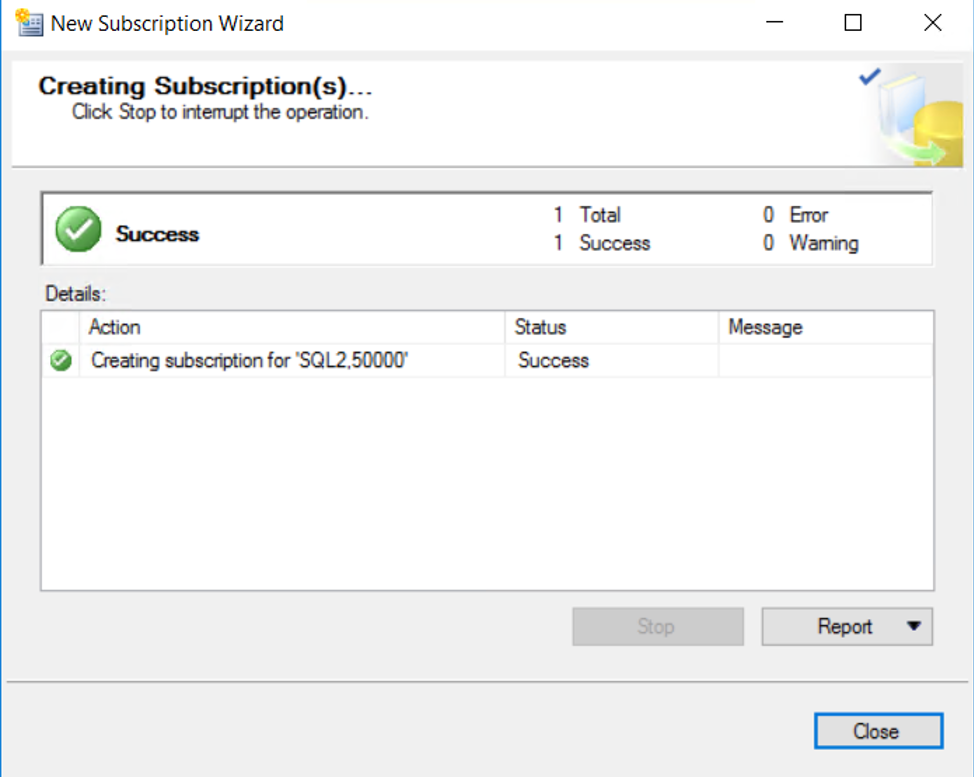
If the subscription creation operation completed successfully, the wizard will notify us with a green check for each completed action or provide us with a meaningful error message in case of any failure, as shown below:
To verify that the Subscription is created successfully, under the Replication node of the SSMS Object Explorer, expand the previously created Publication and you will see all Subscriptions connected to that Publisher and receive data from it, as shown below:

Create Initial Synchronization Snapshot
If you didn’t choose to create an initial synchronization snapshot during the Publisher creation, you still able to create the snapshot after configuring the replication components.
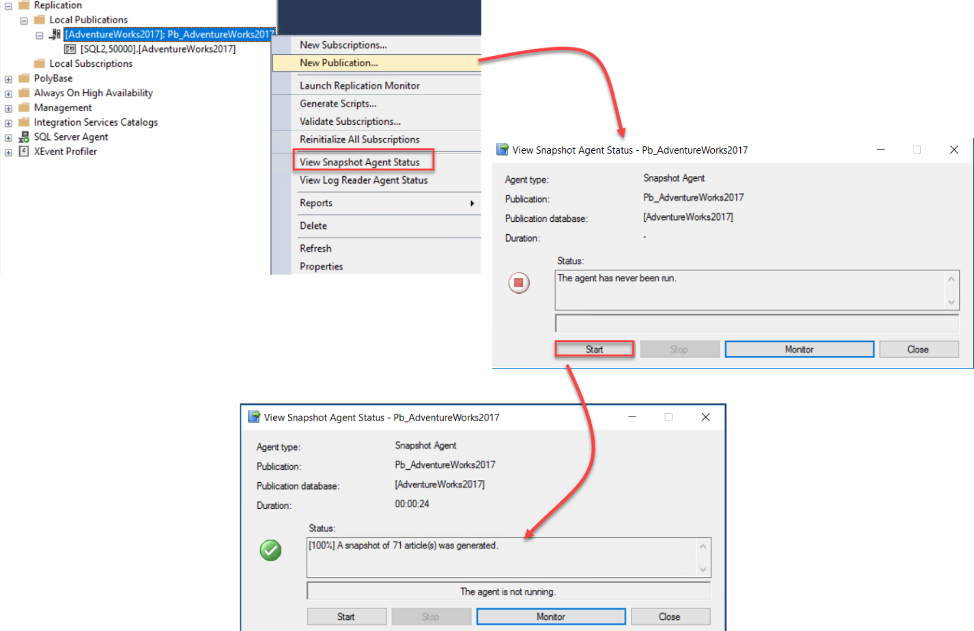
To create an initial synchronization snapshot, right-click on the created Publication and choose the View Snapshot Agent Status option. From the opened window, click on the Start button to run the snapshot agent and create the initial synchronization snapshot. You can also monitor the progress of the snapshot creation process until the snapshot of all articles is created successfully, as below:
Monitor the Synchronization
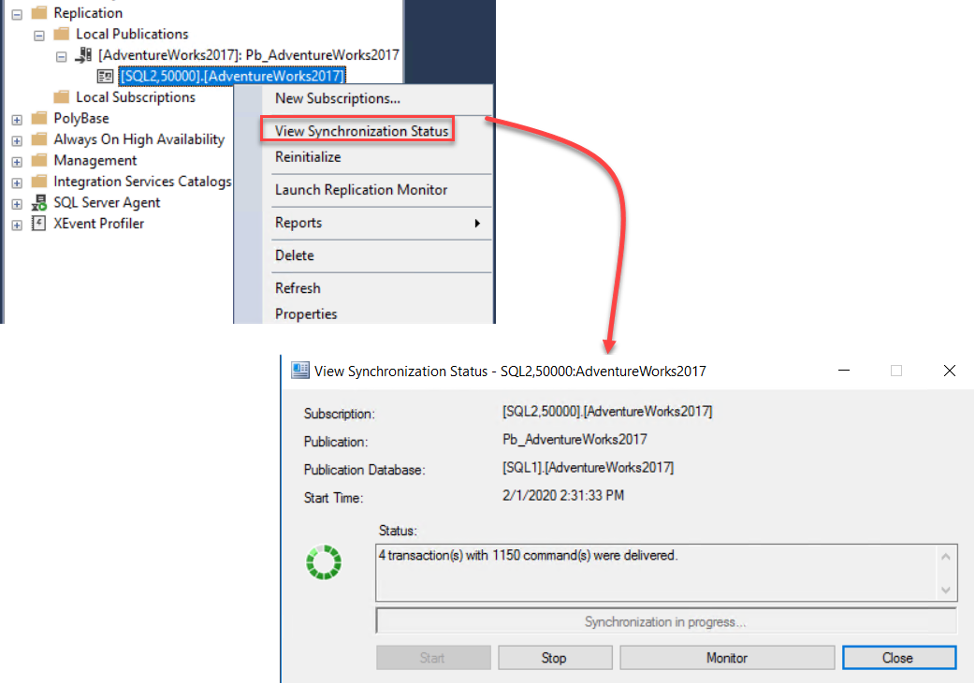
Once the snapshot of the replicated articles is created, the synchronization process with the Subscriber will start automatically, by writing all articles from that snapshot to the Subscriber. To monitor the synchronization process, right-click on the Subscription under the SQL Server Replication node of the SSMS Object Explorer and choose the View Synchronization Status option, where it will show you the number of transactions and commands performed on the Subscriber, as shown below:
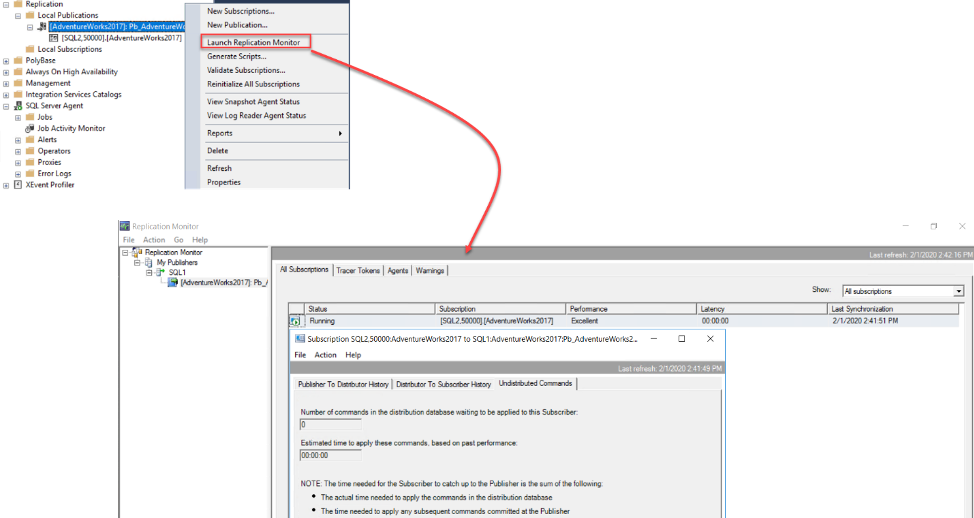
In addition, you can monitor the status of all replication agents and the number of commands pending at the Distributor side and not applied to the Subscriber side, by right-clicking on the Publication name and choose the Launch Replication Monitor Window, as shown below:
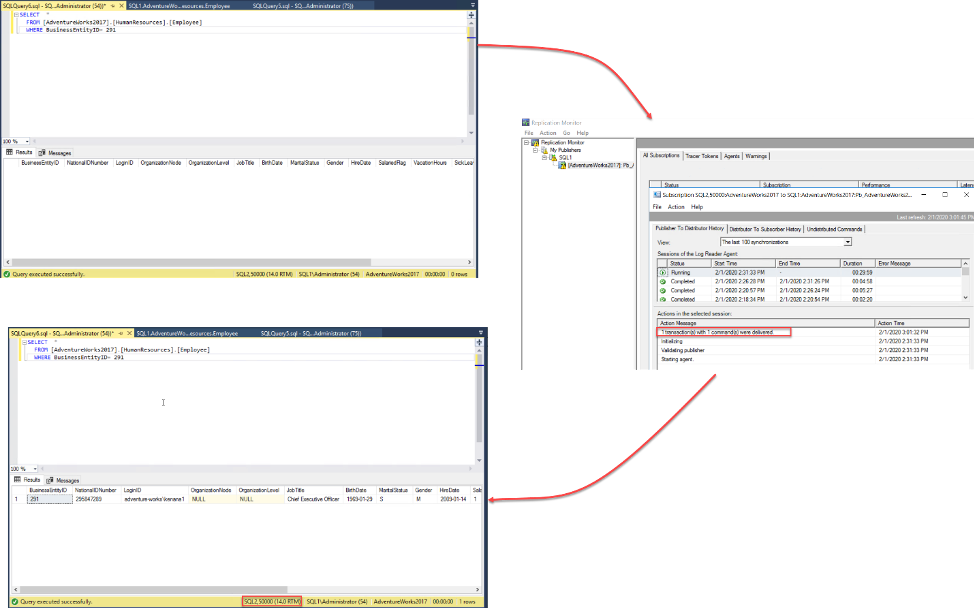
To verify that the replication site is working fine, let us add a new record to one of the replicated articles, “Employee” table, at the Publisher side, which is not available at the Subscriber side, then you will see from the replication monitor window that a new record is delivered from the Publisher to the Distributor then to the Subscriber. After that you will see that the new record is available in the Employee table at the Subscriber side, as shown clearly below:
With clear and easy steps, we built a complete Transactional Replication site that is synchronized and working fine. In the next article, we will see how to troubleshoot an existing SQL Server replication site. Stay tuned.